Connect Claude
Add AdCopilot to Claude on the web or desktop as a custom connector — open Add custom connector, paste the URL, connect and approve, let read-only tools run without asking, then say "Get me started with AdCopilot". Works on Claude's Free plan.
Claude on the web and the desktop app take AdCopilot as a custom connector: a name and one URL. It takes about two minutes, and it worked on Claude's Free plan when we checked.
Every label below is Claude's own, checked click by click on 24 September 2026. Claude's layout differs between accounts: some open Customize as a full page, others as a settings box. The direct link in step 1 works on both, so start there.
Before you start, connect Google Ads (and any other Google product) at app.adcopilot.cloud. See Connect Google Ads.
1. Open Add custom connector
This link opens Claude's Add custom connector box straight away. If you are signed out, Claude asks you to sign in first.
Open Add custom connector in Claude
To get there yourself: in Claude's sidebar choose Customize, then Connectors, press + Add at the top right, and choose Add custom connector.

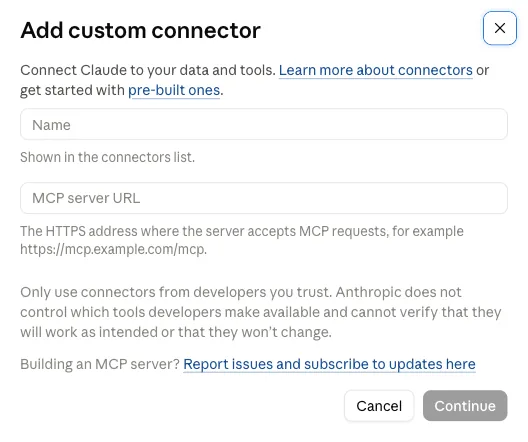
In a Team or Enterprise organisation, an owner may need to add custom connectors for you.
2. Fill in the form
| Field | Value |
|---|---|
| Name | AdCopilot |
| MCP server URL | the URL below |
https://mcp.adcopilot.cloud/mcpPress Continue. If Chrome's autofill list covers the URL box, press Esc to close it.
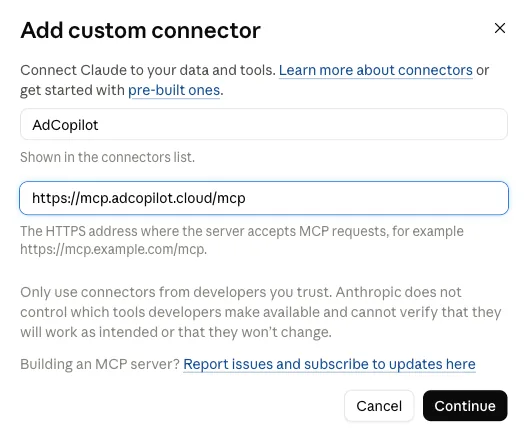
3. Leave the sign-in settings as they are
The next screen shows Claude's sign-in settings. Sign in now and Use Claude's published identity are already selected and marked Detected. Don't change them. Scroll down and press Add.
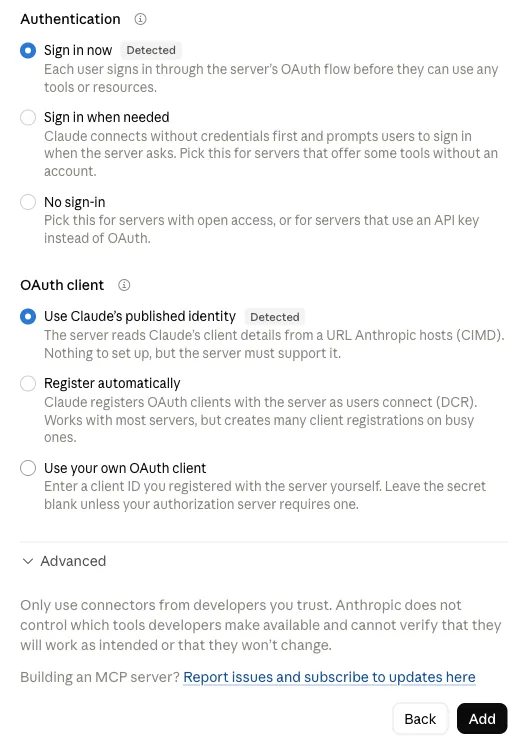
4. Connect and approve
Claude opens the connector's page: You're not connected to AdCopilot yet. Press Connect.
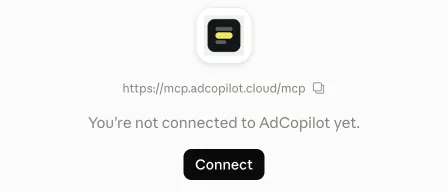
Our page opens, Let Claude use your AdCopilot?, and lists what Claude will be able to do. Press Approve.
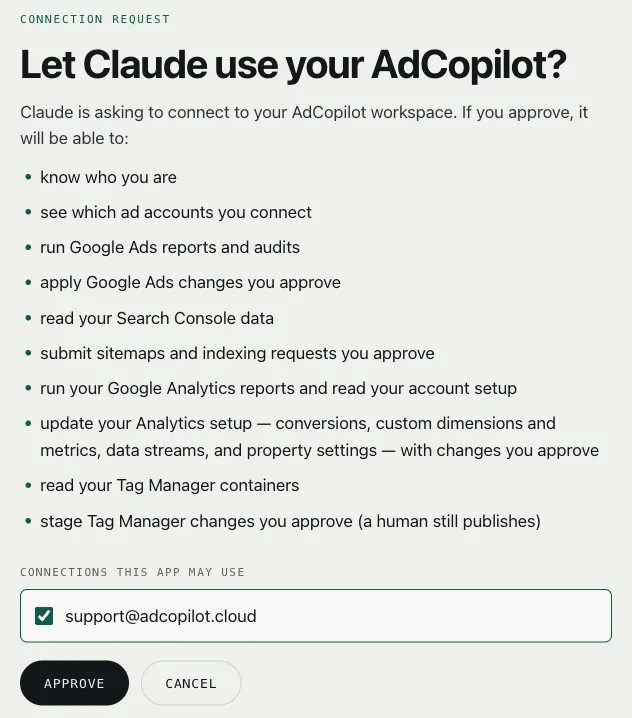
You land back in Claude, which lists AdCopilot's tools straight away.
5. Let reads run without asking
Under Tool permissions, Claude sorts AdCopilot's tools into Read-only tools and Write/delete tools, each on Needs approval to begin with. That is why Claude stops to ask ("Claude wants to use …") the first time each report runs.
Open the menu beside Read-only tools and choose Always allow. Leave Write/delete tools on Needs approval.
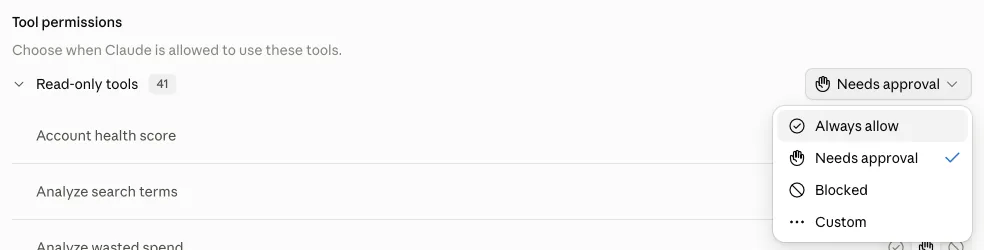
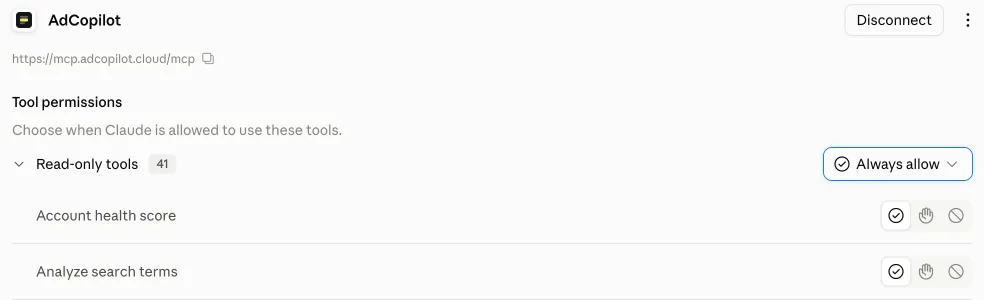
Reports and audits then run without a prompt each time. Claude still asks before every change while Write/delete tools stay on Needs approval: that prompt is Claude's, not AdCopilot's, so keep it. AdCopilot proposes each change in the chat first, and it can never delete. See Approval-gated writes.
6. Say hello
Start a new chat and send:
Get me started with AdCopilot

You don't need an @ in Claude: it picks AdCopilot on its own. In the AdCopilot dashboard, AI assistants shows Connected once Claude has made its first call.
If something goes wrong
See Connecting Claude for: Claude asking permission before every report, Chrome's autofill covering the URL box, no Customize in the sidebar, and custom connectors in a Team or Enterprise organisation.
Picking up new tools
Claude keeps the tool list it was given when you approved it. After an AdCopilot release adds tools, open AdCopilot under Customize → Connectors, press Disconnect, then connect it again. AdCopilot tells you in the chat when this is needed. Connecting another Google product needs nothing here, unless Connections marks Claude Re-authorization needed. See Reconnecting.
Disconnecting
Press Disconnect on AdCopilot's page under Customize → Connectors, or Revoke Claude under Connections in the AdCopilot dashboard.
Connect ChatGPT
Add AdCopilot to ChatGPT in developer mode — turn developer mode on, create the app with the connector URL, sign in and approve, then type @AdCopilot in a new chat. Works on ChatGPT's Free plan.
Connect Claude Code and Codex
In Claude Code, install the AdCopilot plugin or add the connector with one command. In Codex, one command. Then approve it in your browser and ask from the terminal.